Homemade Kale Crackers: The Easy 45-Minute Healthy Snack
Tired of the same old snacks, or perhaps looking for a crunchy alternative to processed chips? Move over, kale chips—there's a new, equally healthy, and even more satisfying contender in the world of wholesome munchies: simple homemade kale crackers! Forget those store-bought versions laden with questionable ingredients; these delectable crackers are incredibly easy to bake, require minimal effort, and can be ready to transform your snacking game in just 45 minutes. Imagine biting into a crisp, savory cracker, knowing exactly what went into it, and feeling absolutely no guilt. That's the promise of this recipe. For many of us, the mid-afternoon slump or the late-night craving calls for something crunchy and satisfying. While some might reach for a bag of potato chips, these homemade kale crackers offer a far superior, nutrient-dense option. They utilize fresh kale, flax seeds for an added boost of omega-3s, healthy olive oil, an egg for binding, and a touch of flour to create that perfect cracker base. Not only are they delicious, but they’re also a fantastic way to use up that abundant bunch of kale from your garden or refrigerator.Why Choose Simple Homemade Kale Crackers Over Store-Bought Snacks?
The rise of health-conscious eating has many of us scrutinizing ingredient labels more closely. Unfortunately, many "healthy" store-bought snacks still contain hidden sugars, excessive sodium, unhealthy refined flours, or artificial preservatives. This is where the beauty of making your own simple homemade kale crackers truly shines. First and foremost, you gain complete control over the ingredients. You can opt for organic kale, choose your preferred type of flour (all-purpose, whole wheat, or even gluten-free blends work beautifully), and select high-quality olive oil. This level of transparency ensures that every bite contributes positively to your well-being, steering clear of any unnecessary additives or unhealthy fats. They offer a truly Guilt-Free Crunch: Bake Your Own Healthy Kale Crackers experience, unlike many commercial options that often leave you feeling unsatisfied or bloated. Beyond the health benefits, there's an undeniable satisfaction in creating something wholesome with your own hands. The aroma of freshly baked crackers filling your kitchen is an experience in itself. Plus, homemade crackers are often more cost-effective than their gourmet, health-food store counterparts, making them a smart choice for your wallet too. They’re a fantastic staple for meal prep, ensuring you always have a genuinely healthy option ready when those snack cravings hit, without having to compromise on taste or crunch.The Simple Pantry Staples You'll Need (and Why They Work)
One of the most appealing aspects of making these simple homemade kale crackers is that they rely on common pantry ingredients you likely already have on hand. There's no need for a special trip to the grocery store! Each component plays a crucial role in creating the perfect texture and flavor profile. Let's break down the essential ingredients:- Fresh Kale: This is the star of the show! A single bunch (typically 7-8 oz) is usually enough. Kale provides a nutrient powerhouse, packed with vitamins K, A, and C, and a host of antioxidants. By blending it into a puree, you effortlessly incorporate a significant dose of greens into a snack your whole family will love. It's an excellent way to utilize excess kale, especially if you have an abundant harvest. For more tips on making the most of your garden produce, check out our guide on From Garden to Plate: Simple Homemade Kale Crackers Recipe.
- Olive Oil: More than just a flavor enhancer, olive oil plays a vital role in processing the kale into a smooth puree and contributing to the crackers' crisp texture. It's a healthy fat source that also helps bind the ingredients.
- Flour: This forms the structural base of your crackers. All-purpose flour works perfectly, but you can experiment with whole wheat flour for added fiber or a gluten-free blend for dietary needs.
- Flax Seeds: These tiny seeds are nutritional powerhouses, adding a delightful crunch, a nutty flavor, and a healthy dose of omega-3 fatty acids and fiber. They also act as an additional binder.
- Egg: The egg is crucial for binding all the ingredients together, creating a cohesive, sticky dough that’s easy to work with and ensures your crackers hold their shape.
- Salt and Sugar: A pinch of salt enhances all the flavors, while a touch of sugar (optional, and adjustable to taste) can balance the slight bitterness of kale, giving the crackers a well-rounded savory profile.
- Water: Sometimes, depending on the flour's absorption or the kale's moisture content, a little water is needed to achieve the perfect dough consistency – not too dry, not too wet.
Your Step-by-Step Guide to Crunchy Perfection: How to Make Simple Homemade Kale Crackers
Creating these amazing simple homemade kale crackers is a straightforward process, largely thanks to the efficiency of your food processor. Follow these steps for cracker perfection in about 45 minutes:1. Prepare the Kale Puree
Begin by washing your kale thoroughly. Remove the tough stems from the leaves and tear the leaves into smaller, manageable pieces. Place the torn kale leaves into your food processor. Add the olive oil. Process until the kale is finely chopped and begins to form a smooth, vibrant green puree. Scrape down the sides of the bowl as needed to ensure everything is evenly blended. The olive oil helps break down the kale and achieve that desired smooth consistency.
2. Form the Cracker Dough
Once the kale puree is ready, add the remaining ingredients to the food processor: flour, flax seeds, salt, sugar, egg, and a tablespoon or two of water (if starting with dry flour, you might need more). Pulse for about 15-20 seconds, or until a sticky dough forms. The dough should be cohesive enough to gather but still quite moist. If it feels too dry and crumbly, add water, one teaspoon at a time, and pulse again until the desired consistency is reached. Conversely, if it seems too wet, add a tiny bit more flour.
3. Flatten and Shape the Dough
Preheat your oven to 350°F (175°C). Line a large baking sheet with parchment paper and lightly dust it with a bit of flour. Transfer your sticky kale dough to the prepared baking sheet. Dust the top of the dough with a little more flour, then place another sheet of parchment paper over it. Using a rolling pin, flatten the dough out evenly to about 1/8 to 1/4 inch thick. Aim for uniform thickness across the entire sheet, as this ensures even baking and consistent crispiness. Remove the top layer of parchment paper.
Next, using the blunt edge of a knife, gently score the dough. Make horizontal and vertical lines, cutting about halfway through the dough, to create your desired cracker shapes (squares or rectangles work well). This scoring makes it incredibly easy to break the crackers apart once they're baked and cooled.
4. Bake to Golden-Brown Perfection
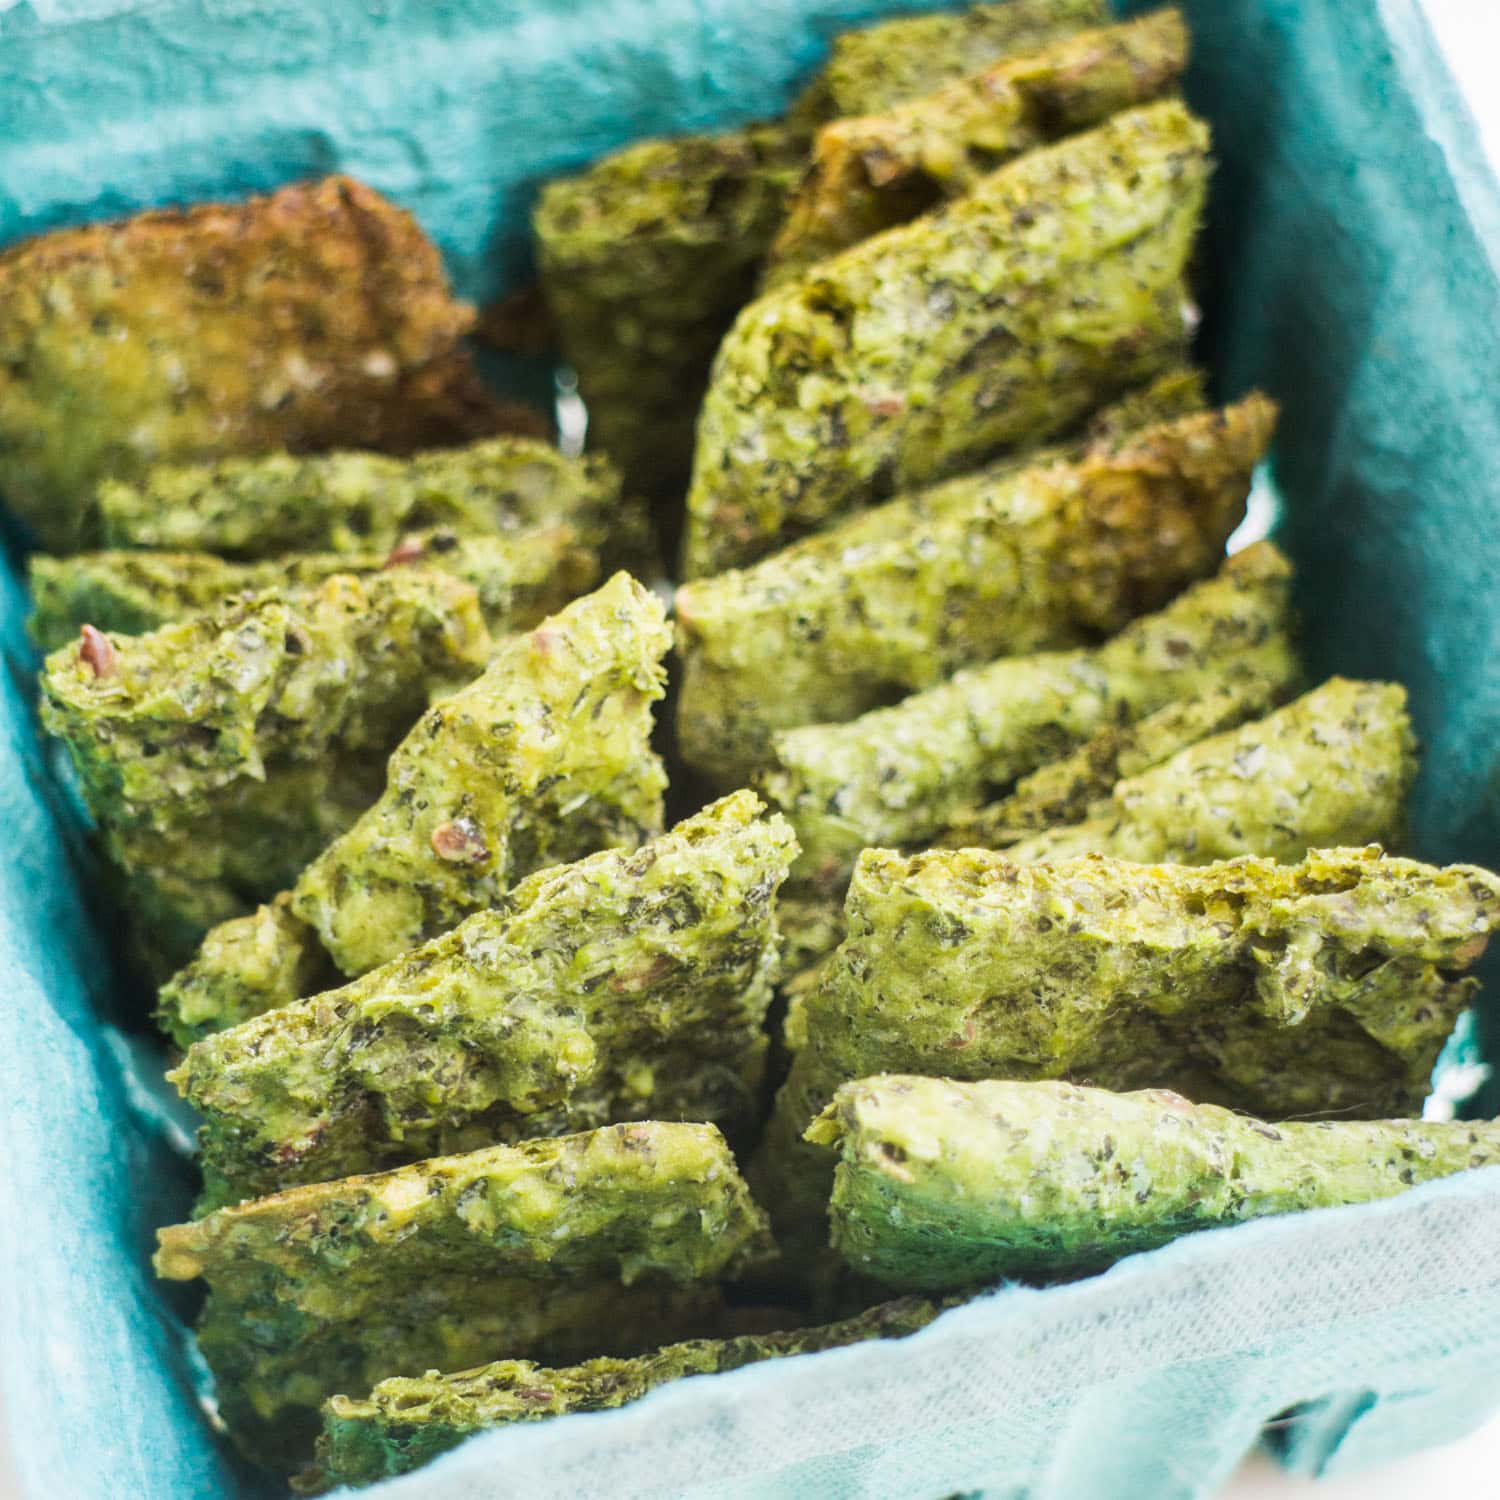
Sprinkle a final pinch of salt over the scored dough for extra flavor. Transfer the baking sheet to your preheated oven. Bake for approximately 25-30 minutes. Baking times can vary significantly based on your oven's calibration, the thickness of your dough, and even the type of baking sheet you use. Start checking the crackers at the 15-minute mark, and then every 5 minutes thereafter. You’re looking for a dark brownish-green surface and edges that appear crisp. They should feel firm to the touch. If some parts are browning faster than others, you can carefully rotate the baking sheet.
5. Cool, Break, and Enjoy!
Once baked, remove the crackers from the oven. This step is crucial for achieving maximum crispness: let them cool completely on the baking sheet for at least 15 minutes, or even longer. While still warm, they will be a bit pliable, but as they cool, they will firm up and become wonderfully crunchy. Once cooled, simply break them along the scored lines into individual crackers. Serve immediately or store them in an airtight container at room temperature for up to a week. They are perfect for dipping in hummus, crumbling over salads, or simply munching on their own!
